Build powerful enrichment and search workflows without heavy engineering
Kaleb Medel
01/16/26
10 min
Most customer use cases involve pulling records from one of our API endpoints to be uploaded or ingested into a separate location, such as other business apps that let them directly utilize that data. This can be a CRM, a database, or even a simple google sheet for tracking records of interest.
In this doc, we’ll explain how to use Make.com to connect our APIs to your other data locations. This way, you can be up and running with our endpoints without spending the time and resources needed for custom engineering or scripting.
What is Make.com?
Similar to Zapier, Make.com is an automation tool that allows you to directly integrate diverse apps for the purpose of creating automated workflows. The key difference is that Make.com allows for more technical functionality and overall options in how those workflows can be set up.
It boasts a web-like UI that allows for branching paths, loops, and other determinative actions. Setting up your first scenario, their term for a workflow, only requires a few simple steps:
Click the plus symbol to choose the app and action that will start the workflow. This action can act as the “trigger” to start the workflow (denoted by an INSTANT tag), or simply be the first action that takes place in a scheduled workflow. Clicking on the clock module will let you set the schedule.
Fill in any appropriate details for the action. This may include trigger specifications, any data that will be processed, and more.
Choose the next app in the scenario, and what the following action will be. The more complex the action, the more details you will need to clarify in order to be sure it will run according to your needs.
Repeat step 3 as many times as needed. You can continue a straight workflow, click a previous module to add branching paths and logic, use previously gained values for future scenario steps, and more.
In walking through the processes outlined below, you’ll likely see an overwhelming amount of options for what can be done with each app in the scenario - far more than we can touch on here. We recommend taking more time to fully explore Make.com’s documentation to get a full grasp of what is possible.
For guidance on setting up a Make.come account and connecting our APIs, you can also visit our documentation on Make.com Integration.
Building and Enrichment API Scenario
The simplest make.com scenario you can build is one that utilizes one of our Enrich APIs (Person or Company) to pull enrichment inputs from any number of places, submit them to an enrichment endpoint, then store any results in a separate location.
Select a location to pull enrichment inputs from, and the trigger for your scenario. This can be anything from a simple google sheet or app that runs the scenario when a new row/record is added, to a webhook or API that runs on a regular cycle, depending on your technical comfort level and use-case.
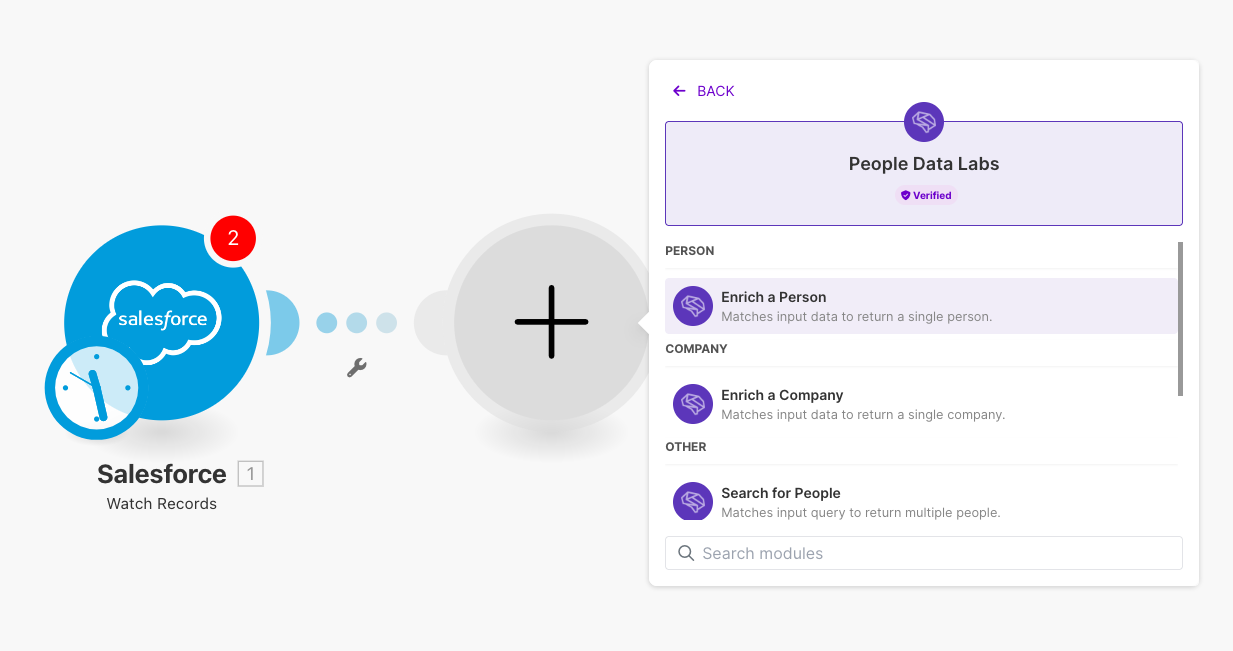
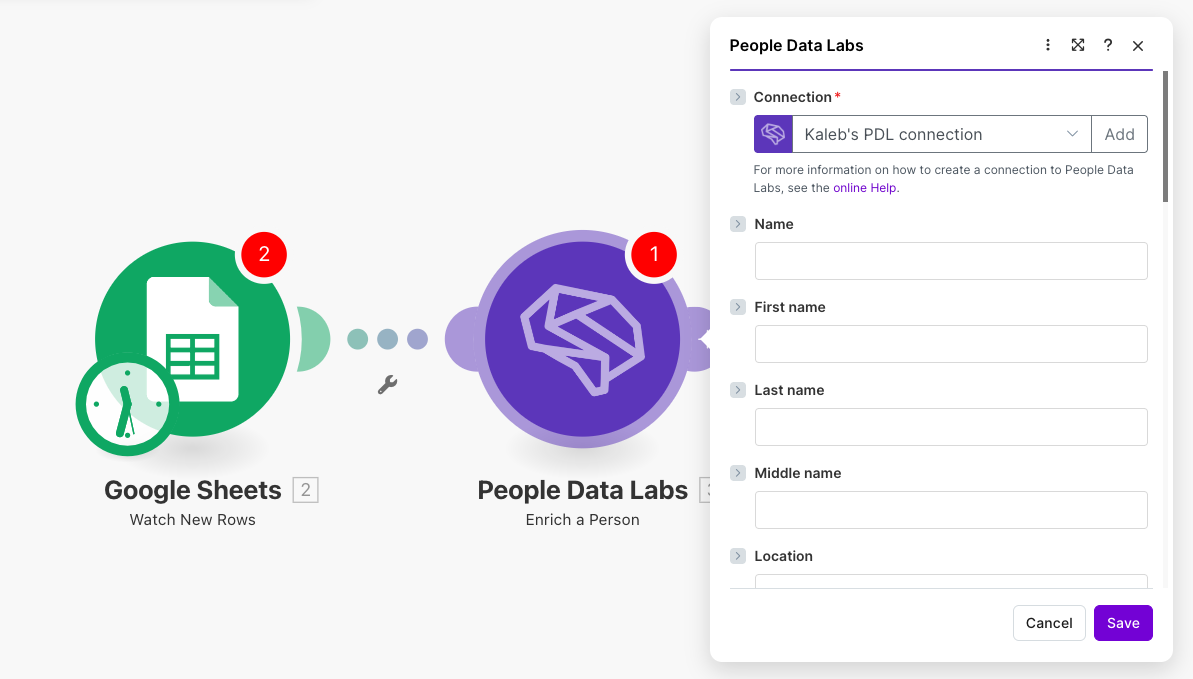
For the second module, select People Data Labs and then the Enrich a Person/Company option. Selecting an input will allow you to map it to a field from your sheet/app of choice.
Select the App where you’ll want to send the enriched records. You’ll see additional options for mapping the PDL fields back to your own data fields, depending on the app.
Lastly, select the ‘wrench’ option under the connection between modules 2 and 3 to add any required filters. We highly recommend a numeric operator filter to screen any results with a 404 in the Status field, ending the scenario in cases where no PDL record is found.
As you set the scenario up, feel free to dig through the various options at each step to get a full sense of what is possible. As these are context dependent, you may see ones that are different or unique compared to other scenarios you’ve set up before, and it may spur new ideas for even more efficient or creative ones.
Building a Search API Scenario
Next, you can use the Search for People module to pull search parameters from a designated location, submit them to a search endpoint, then store any results in a third location.
Select a location to pull search parameters from, and the trigger for your scenario. You can either set up a scenario to run when you identify new parameters, set one to run using the same parameters on a regular cycle, or more.
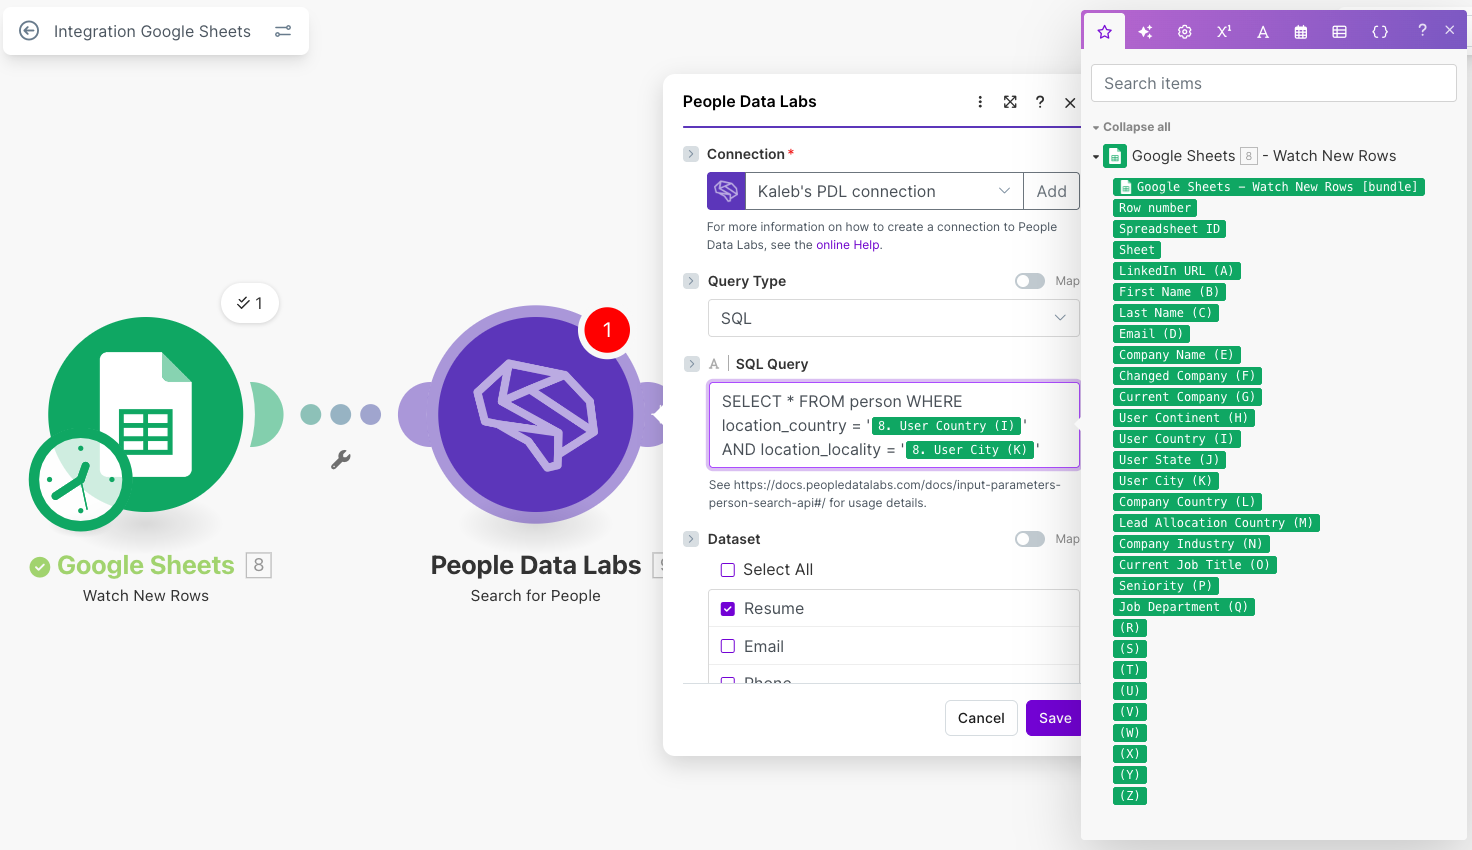
For the second module, select People Data Labs and then the Search for People/Companies option.You will need to choose an SL or ES query type and add the query into the field. You can also specify a specific dataset (Resume is default), any titlecasing. The batch size (‘size’) and the overall count of records, if larger than the batch (‘limit’).* Remember that you’ll use a single search credit for every record that you pull.
Select the App where you’ll want to send the results. Finish by mapping the PDL fields back to your new data source.
Add any additional filters or branching paths, depending on your specific needs. One example is a filter that checks for certain fields in the response records, and saves them to different spreadsheets or apps depending on context.
*NOTE: Setting a Limit higher than the Size will instruct the integration to paginate through record batches.
An important aspect to note about this approach is that it isn’t designed to identify and re-use any scroll token included in the response - which means this method is best used for grabbing a single, one-time batch of records for a query. For those who want to utilize scroll_tokens more minutely, you’ll want to set up a manual HTTP request instead, as explained in the next section.
Building a Person Changelog API Scenario
The last scenario we will cover takes full advantage of make.com’s technical capabilities to build one on par with any scripted workflow. Using the Person Changelog API, we’ll set up a scenario that checks for any updates to relevant person records you’ve previously pulled from a PDL API.
Select a location to pull your person IDs from, and the trigger for your scenario. Because we refresh our data on the 3rd Tuesday of every month, we recommend setting it to run monthly on a date that will always come after the refresh, such as the 25th.
For the second module, select People Data Labs and then the Make an API Call option.
Configure the details of the API request. Manually add the Changelog API URL in the URL field as “person/changelog”, being sure to exclude everything before that portion (otherwise the call will not work). Then set the type to POST. Lastly, your Body request should match the format below (as a raw JSON), though we recommend dynamically pulling the versioning and relevant ids from your initial data location.*
Select the App where you’ll want to send the results. Finish by mapping the PDL fields back to your new or original data source.
Add any additional filters or branching paths, depending on your specific needs. We recommend creating a filter that checks for the existence of “data: data: updated []” in the API response, as this will indicate the record has changed. You can even then add a module to re-enrich for the person’s record in the event of it having updated, or even set the filter to check for the update of specific fields before doing so.
*NOTE: You can include up to 60k IDs per request, separated by commas.
Next Steps
Once you’ve become comfortable with the workflows above, you can start to combine the pieces we’ve covered to create an endless number of complex scenarios to fit your needs. Below, we’ll outline a few higher-level options that we recommend for advanced users:
A scenario that submits input parameters from your database into the Company Search API, then uses the Company ID as an input to find employees via the Person Search API.
A scenario that submits all the location, company or school values in your database to Cleaner APIs for cleaning before submitting your full Person or Company records to the enrichment endpoints.
A scenario that uses the Search or Enrich endpoints to find certain people or companies, then parses the records into different databases or spreadsheets, based on characteristics like size, industry, job title, or revenue.

 Make a Privacy Request